
Build your first schedule
Set store hours and templates, fill the weekly grid, and publish it to your team.
- 1
Set your hours, roles and shift templates
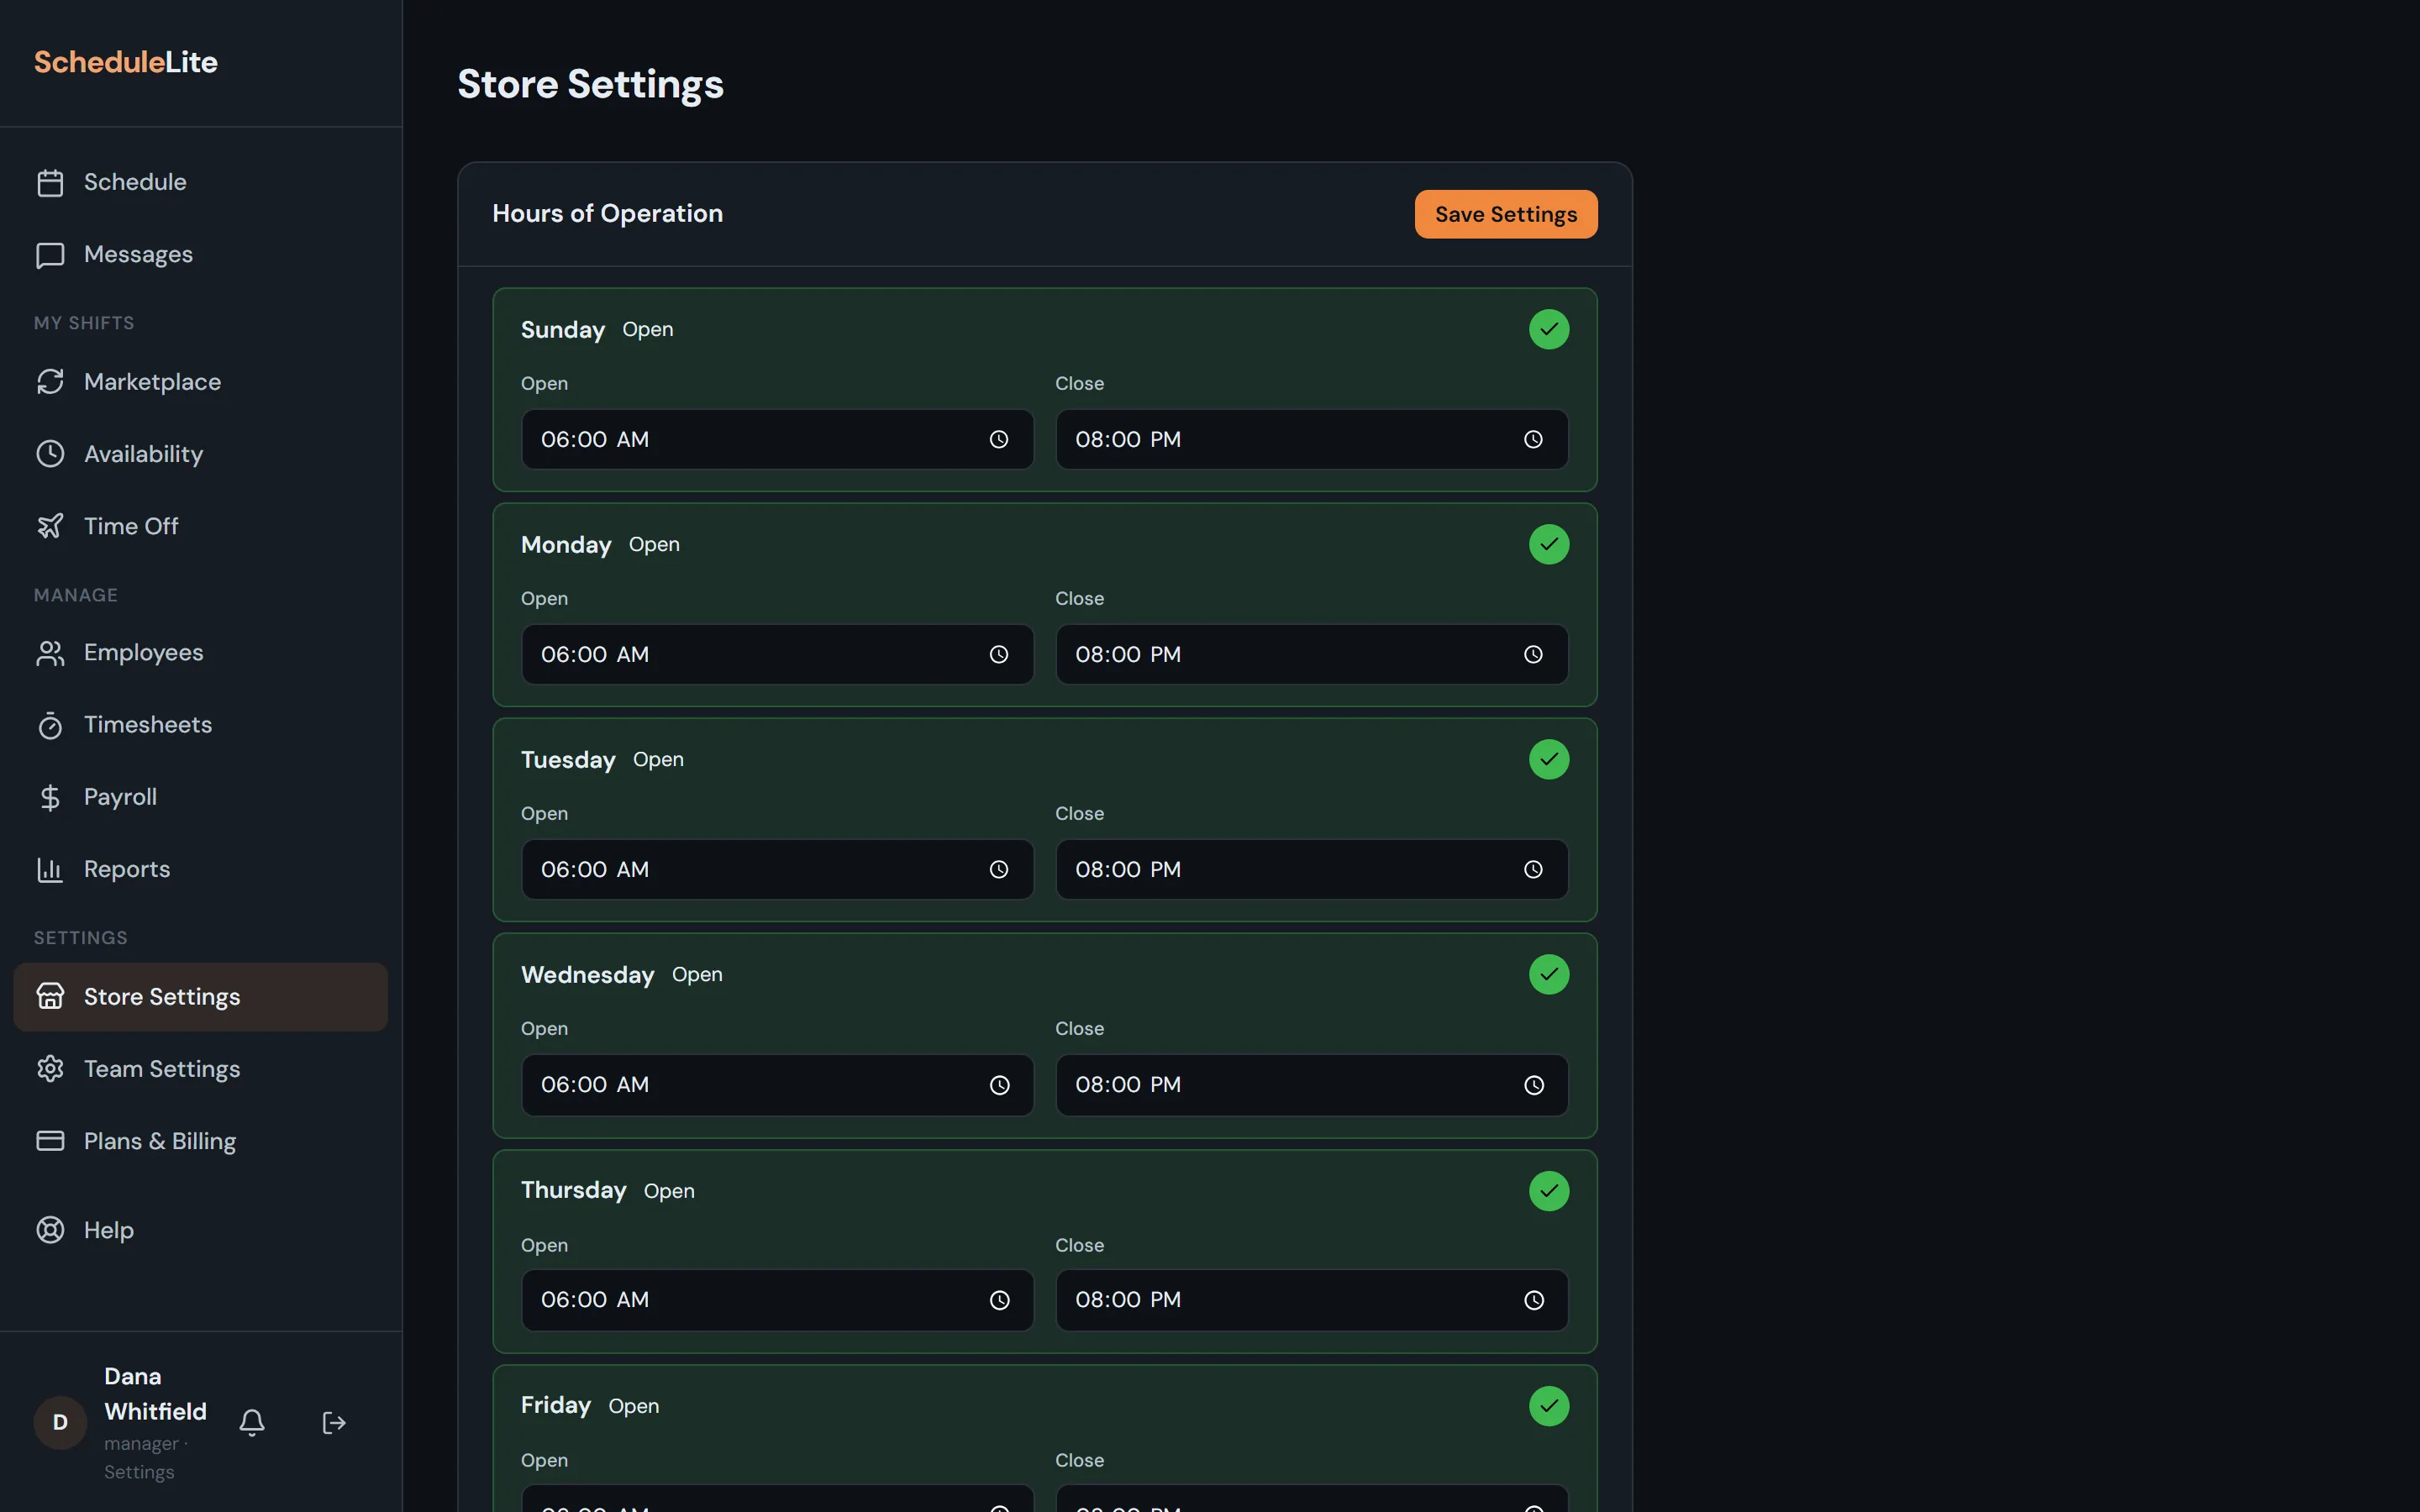
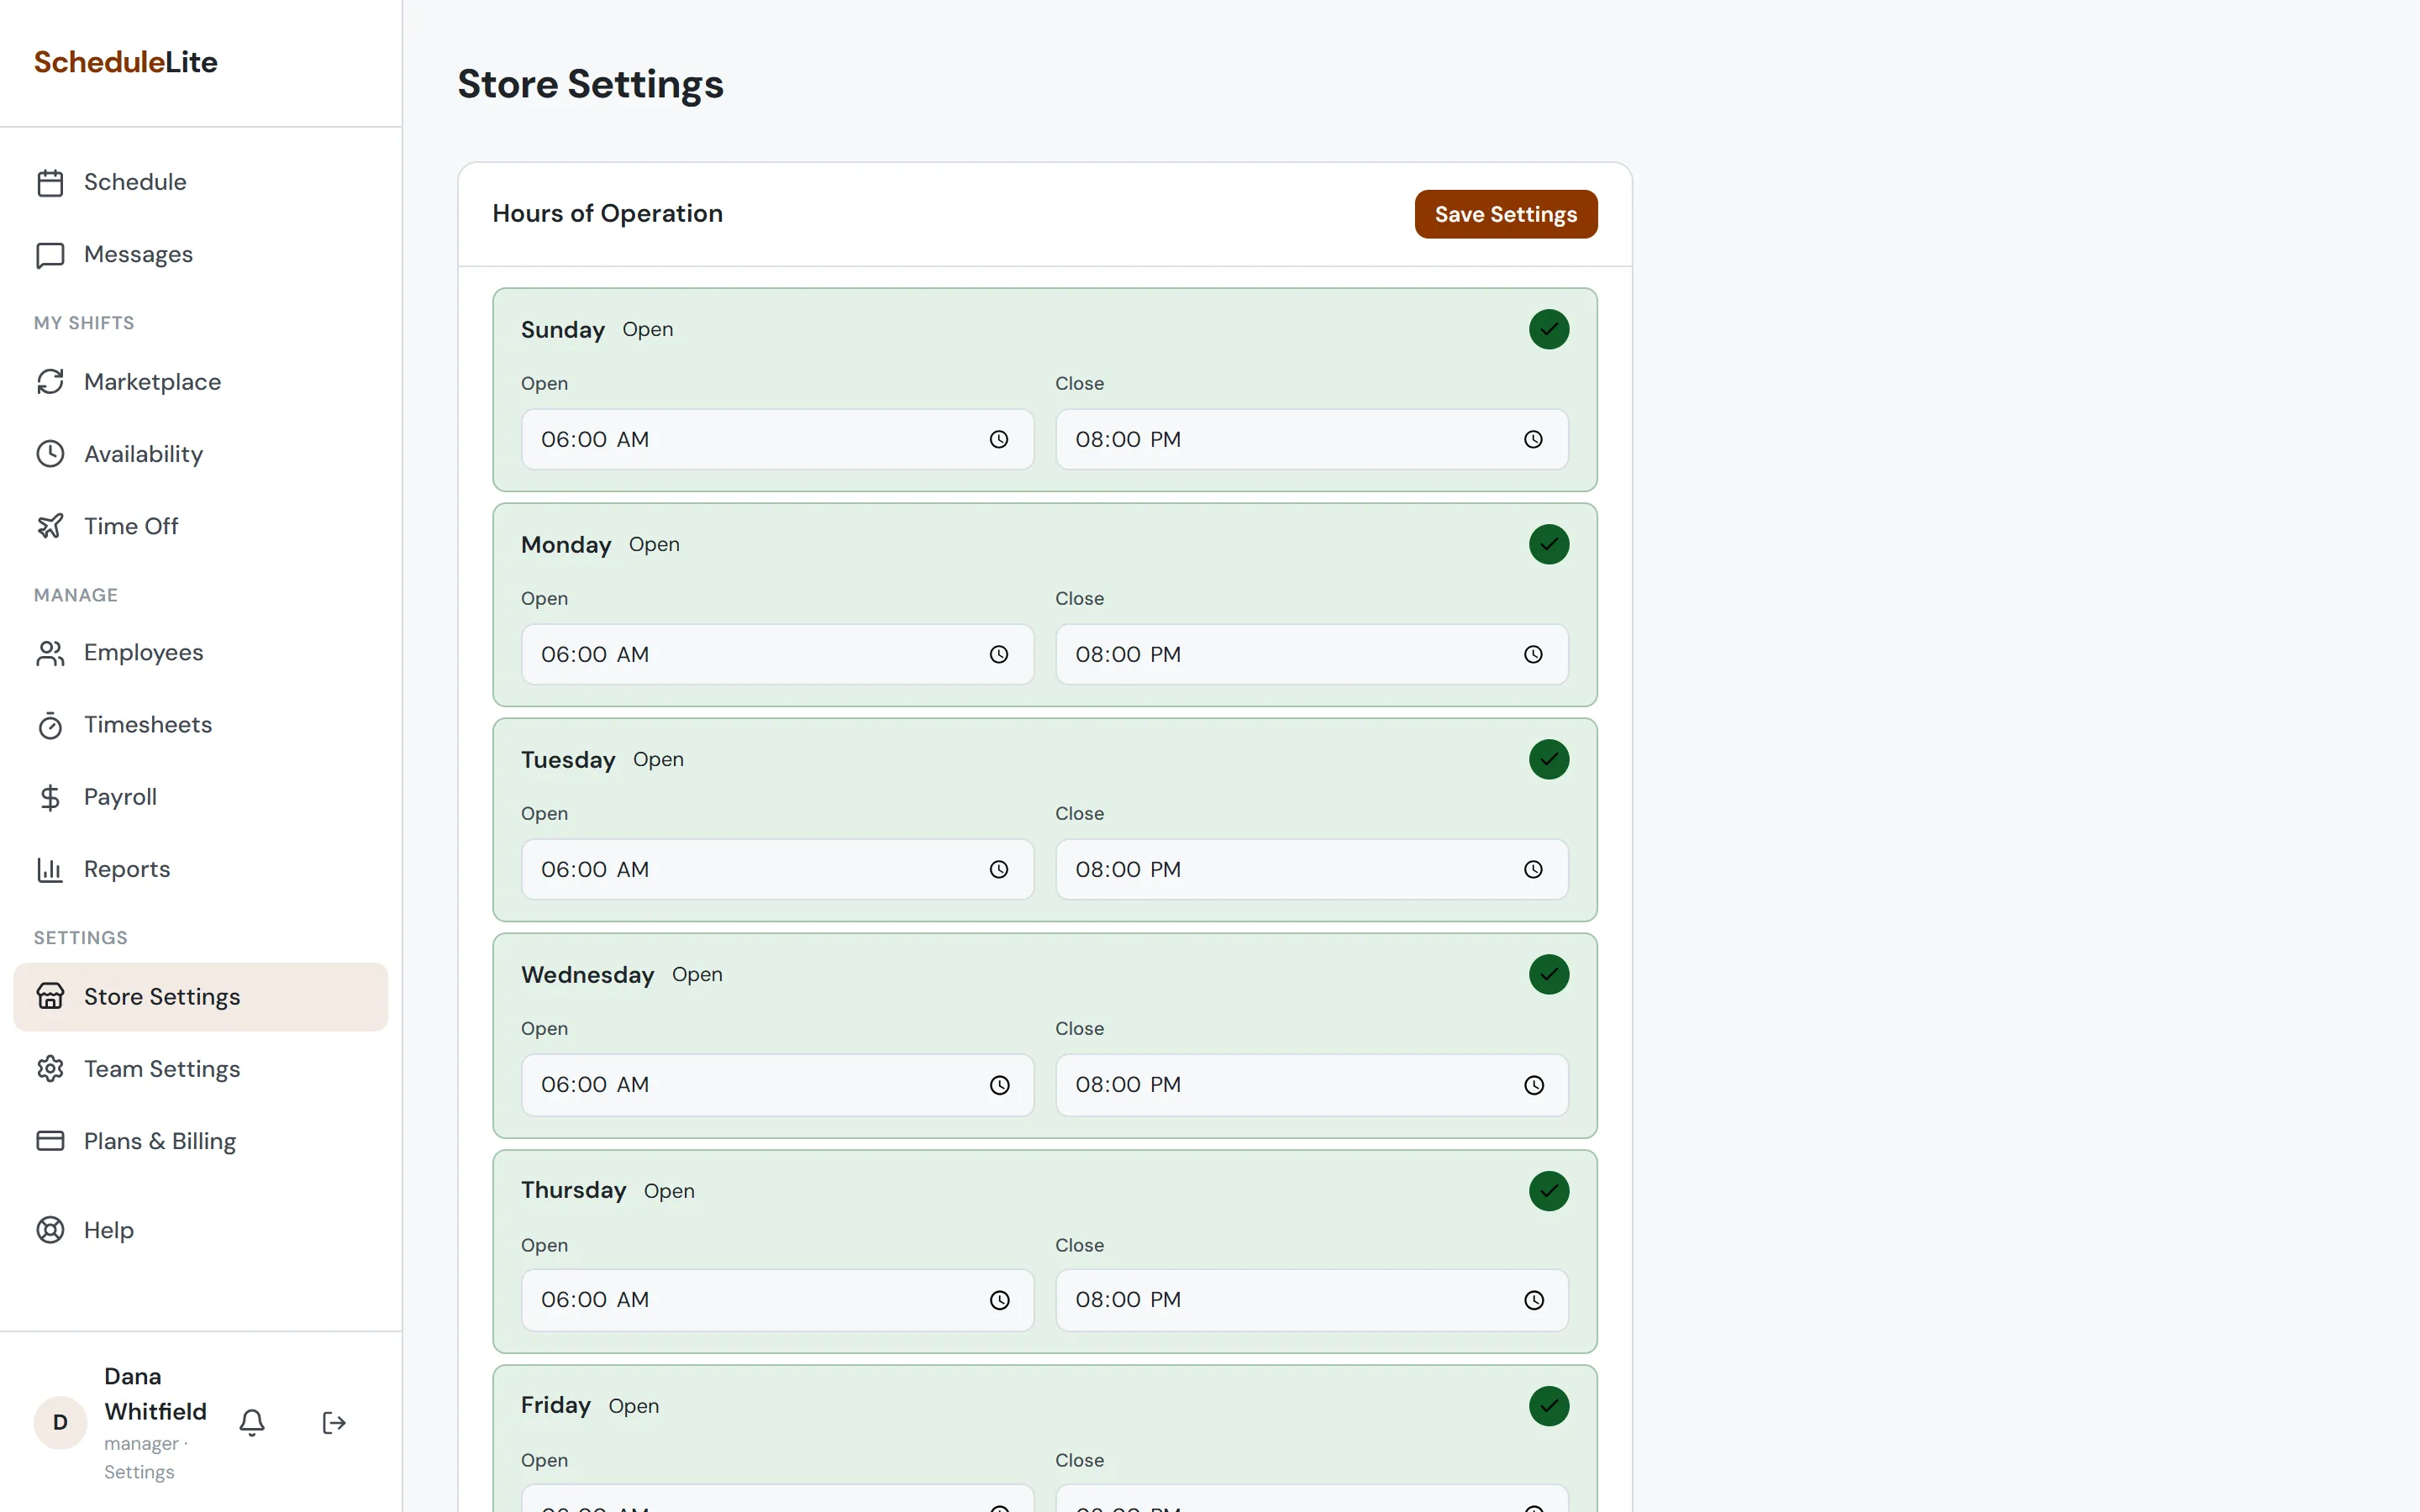
In Store Settings, set the hours you’re open each day, add roles (Barista, Kitchen, Shift Lead…) and save your usual shifts as templates like “Opener 6–12” or “Closer 2–8”. Templates turn adding a shift into a single click.
- 2
Add shifts on the grid
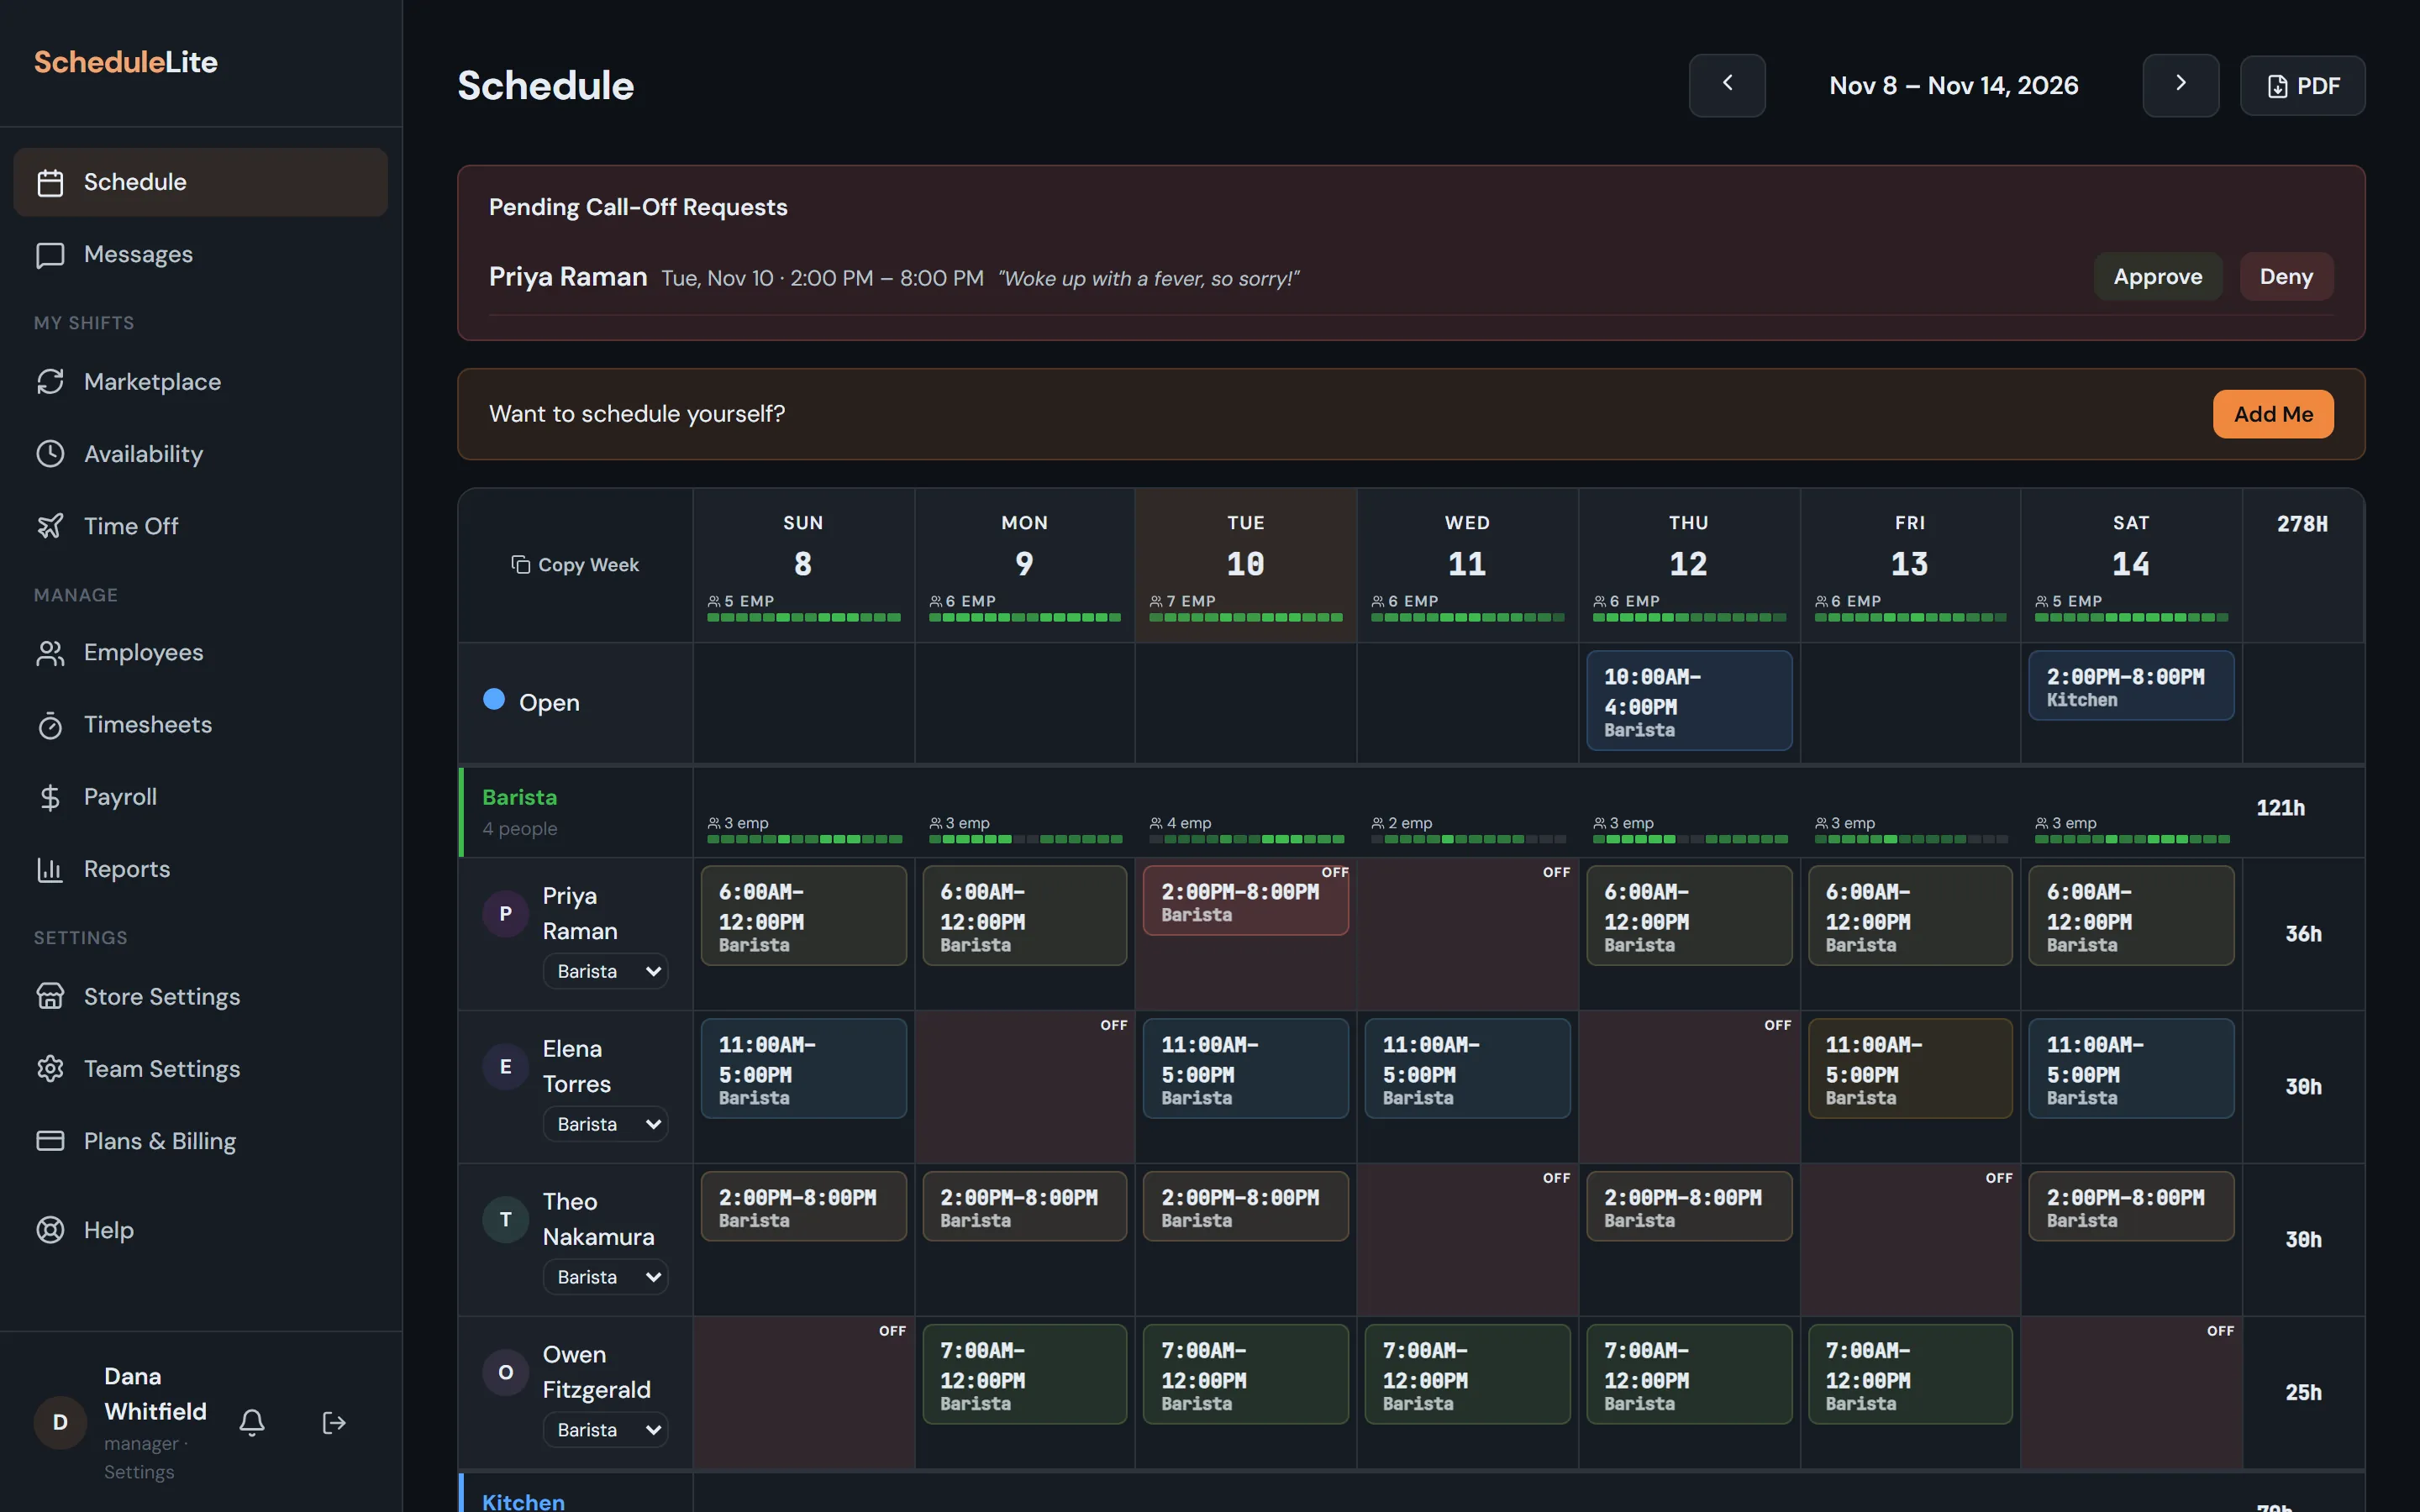
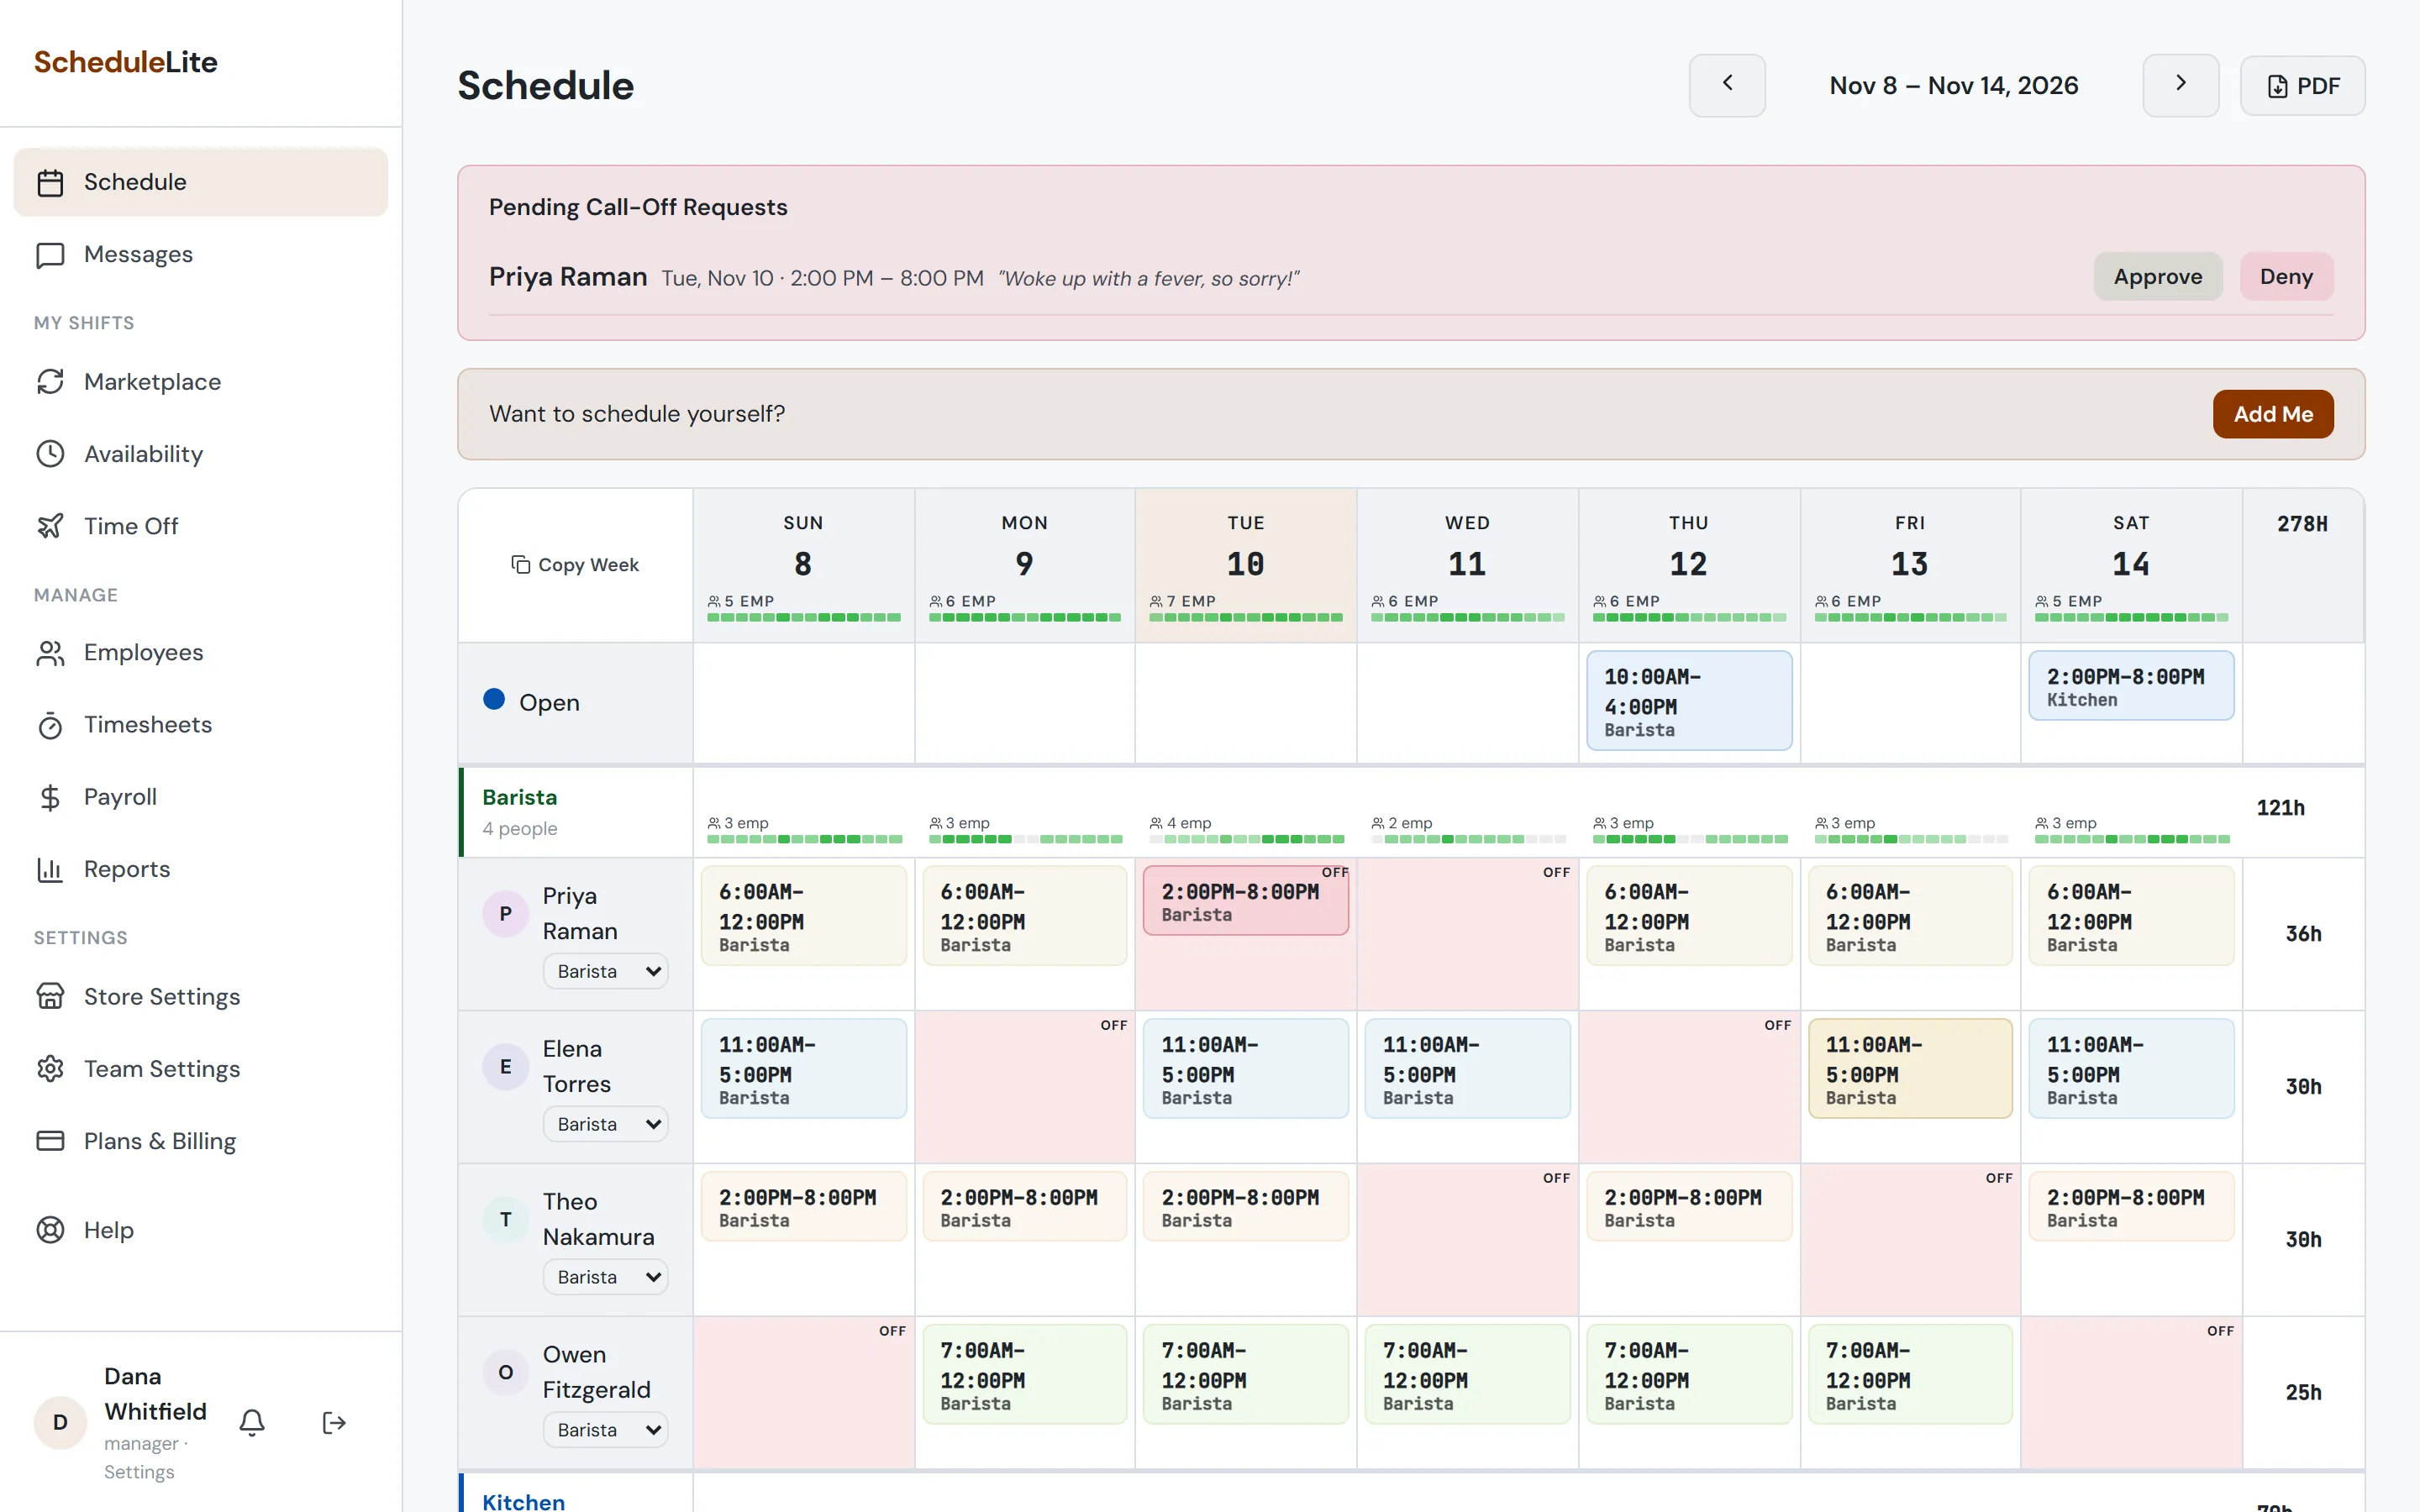
Open Schedule. Each row is an employee, grouped by role; each column is a day. Double-click an empty cell to add a shift, pick a template or type the times, and save. Click an existing shift to edit it.
- 3
Work fast with selection and shortcuts
Click cells to select them, Shift-click to select a range. Ctrl/⌘+C copies the selected shifts, Ctrl/⌘+V pastes them, Delete removes them and Ctrl/⌘+Z undoes. Right-click a shift for “Copy to next day”, and use Copy Week to start from last week’s schedule.
- 4
Check coverage and conflicts
The bars under each day show how many people are on at each hour, so gaps stand out. Days someone marked unavailable are shaded “OFF”, and a shift outside someone’s availability is highlighted red so you can catch it before it goes out.
- 5
Publish
Your edits are held as pending changes until you choose Publish Schedule. Publishing saves everything at once and notifies each employee whose shifts changed.